How to Create DEM from Point Hieght - ස්ථානීය උස දත්ත මගින් DEM නිර්මාණය
- M.F.M. Mafaz

- Jun 19, 2023
- 2 min read
Updated: Nov 21, 2023
Digital Elevation Models (DEMs) are valuable tools used in various fields, including geography, cartography, environmental modeling, and engineering. They provide a three-dimensional representation of the Earth's surface, enabling detailed analysis and visualization. In this blog post, we will explore the process of creating DEMs from point heights.
Here we consider creating a DEM with QGIS software

Creating a Digital Elevation Model (DEM) from point heights in QGIS involves a few essential steps. Follow the instructions below to generate a DEM using QGIS:
1.Import Point Height Data:
Go to the "Layer" menu and select "Layer" >"Add Layer" > "Add Vector Layer." Browse and select the file containing the point height data, and click "Add."
if you have North, East Height( x,y,z) detail, get the details to a csv format and save it then"Layer" >"Add Layer" > "Comma Delimated Text Layer."

2. Preprocess the Point Height Data (if required):
If your point height data is not in the correct format or projection, you may need to preprocess it before creating the DEM.
Remove unnecessary points
3. Create a TIN (Triangulated Irregular Network):
In the Processing Toolbox, search for the "TIN Interpolation" algorithm and open it.
Select the point height layer as the input, specify an output file for the TIN, and set the interpolation method (e.g., Linear).
Click "Run" to generate the TIN.

Generated DEM

4. Adjust DEM Settings (optional):
Right-click on the generated DEM layer in the Layers Panel and select "Properties."
In the "Style" tab, you can adjust the color ramp, transparency, and rendering settings to enhance the visualization of the DEM.

Visual Represenation

5.Save and Export the DEM:
If you want to save the DEM as a new file, right-click on the DEM layer and select "Save As." Choose a format and location for the output file and click "OK" to save the DEM.
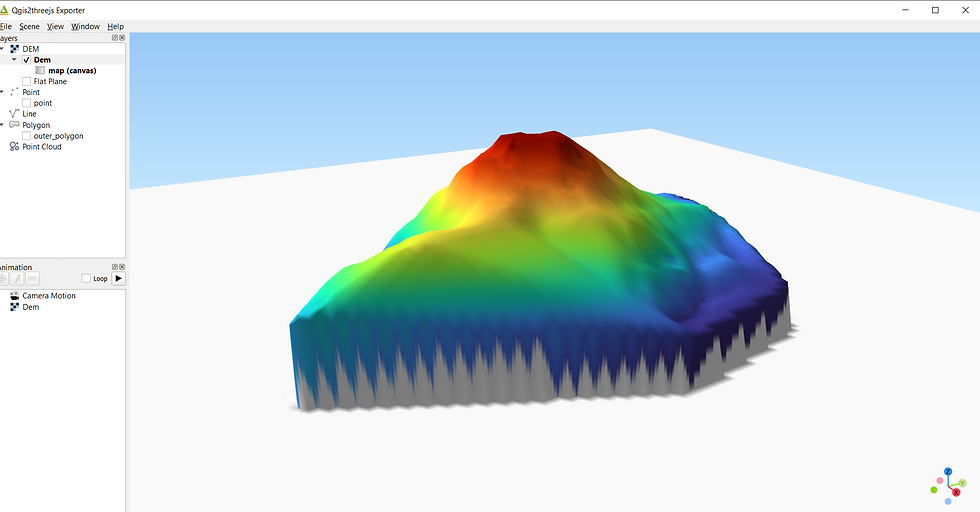
It is better if can Show the DEM in 3D
6. Download and install QGIS2threejs in QGIS
from "Plugins"> "Manage and Install Plugins" then type "QGIS2threejs" in search bar


3D View of the DEM Can be visualized by clicking and draging the mouse button

Congratulations! You have successfully created a DEM from point heights in QGIS. You can now use the DEM for various applications such as terrain analysis, visualization, or further geospatial processing within QGIS.
Aditionaly Rendering the DEM surface can be done by overlaying a back ground satellite image (eg: Bing Satellite image)

With this the 3D DEM will look this

Video for more details
.png)


Comments